Embroidery rewards a slow start. If you spend three minutes learning how to thread a needle and tie a back-knot properly, the next two hours of stitching feel meditative. If you skip these, your thread tangles, your knot pulls through the fabric, and you start the project frustrated.
What you need
- One embroidery needle (size 5 or 7 for cotton)
- One length of stranded cotton, about as long as your forearm
- Your hoop and fabric, taut
- Small embroidery scissors
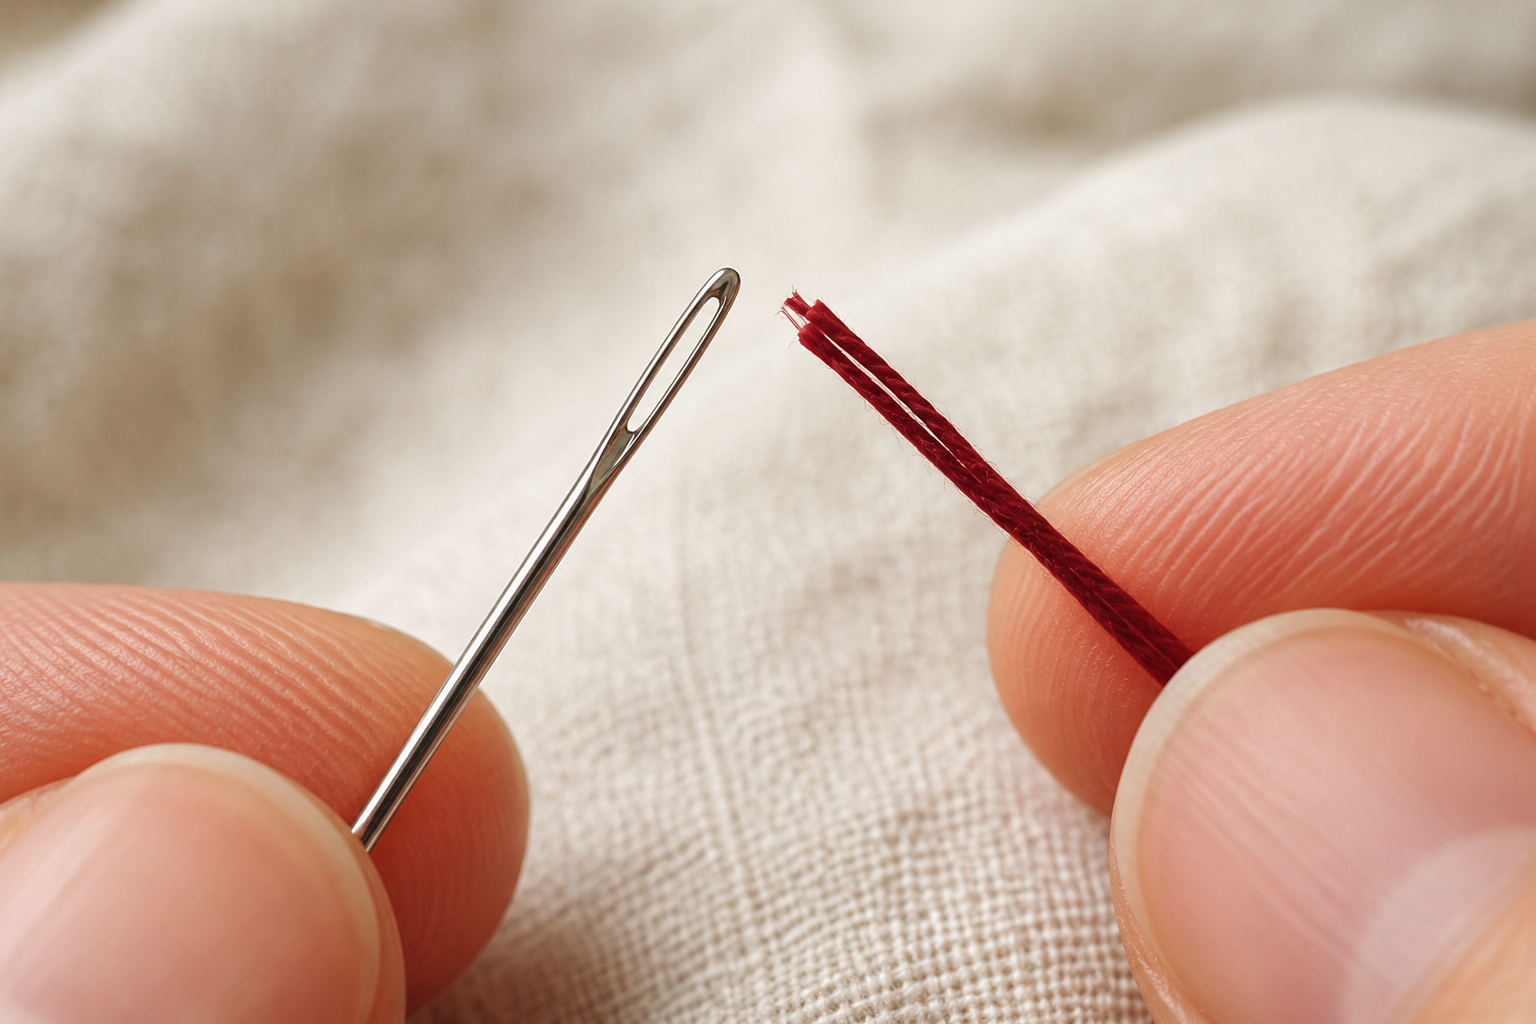
Threading the needle
Cut the thread at a sharp angle — a slanted end goes through the eye more easily than a flat one. Wet it lightly between thumb and forefinger to flatten the fibres. Hold the needle still and bring the thread to the needle, not the other way around.
The back-knot
Wrap the long end of the thread once around the tip of the needle, hold the wrap with your fingernail, and pull the needle through. The wrap slides off as a small knot. This produces a flat, consistent knot — much better than the slipknot you might know from sewing.
Starting from the back
Always bring the needle up from the back of the fabric. Your first stitch is the moment to slow down: choose where the motif begins, mark it lightly with a pencil, and bring the needle up through that exact point. The first stitch decides the line of everything that follows.